How to Repot a Monstera: Step-by-Step Guide for Bigger, Healthier Growth
By Sara Linwood, houseplant writerLast updated
Repot a Monstera every 1 to 2 years in spring by moving it into a pot that is 2 inches (5 cm) wider and filling it with a chunky, airy mix of 4 parts potting mix, 3 parts orchid bark, and 3 parts perlite. Handle the thick aerial and climbing roots gently, trim any mushy brown roots, and set up a moss pole or trellis before the new roots fill the pot.
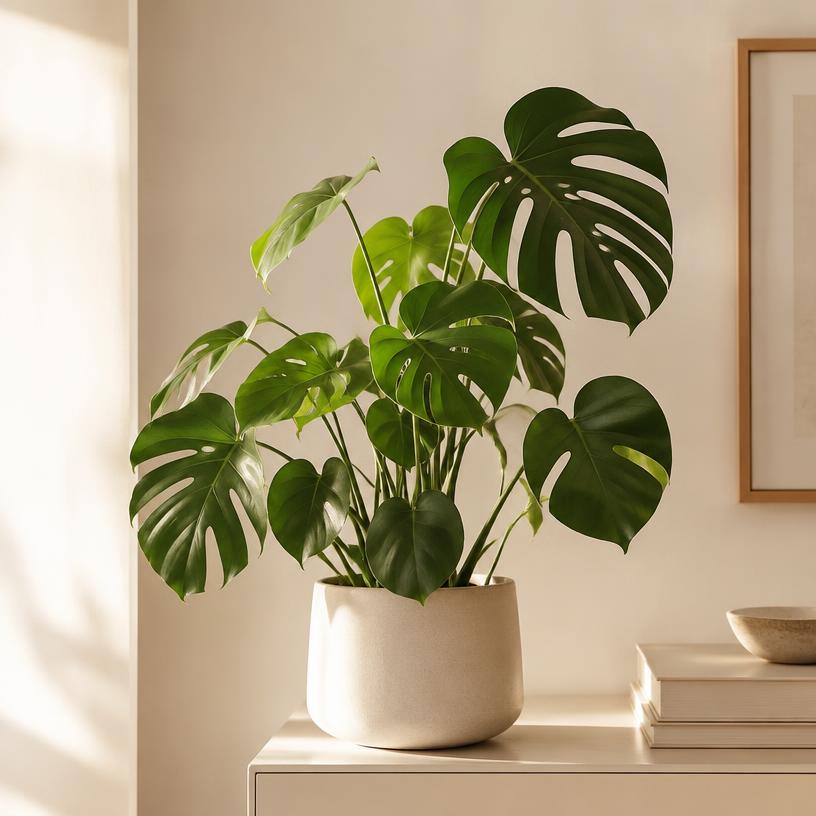
When should you repot a Monstera?
Monstera deliciosa is a fast grower once it is established, and most plants outgrow their pot within 1 to 2 years. Spring through early summer is the best window because the plant is pushing out new leaves and aerial roots, which means it recovers from root disturbance in days rather than weeks. Repotting in late fall or winter, when growth slows, can leave the plant sitting in damp soil for too long.
Look for roots circling the drainage holes, soil that dries out within a day or two of watering, or a plant that has become top-heavy and tips over. If you are not sure whether your plant actually needs it, our guide to signs your plant needs repotting covers the visual cues in more detail. A Monstera that has been in the same pot for 3 years or more, even if it looks fine above the soil, is usually due for a refresh of soil structure alone.
What is the best soil ratio for repotting a Monstera?
Monstera has thick, fleshy roots along with aerial roots that climb and anchor in the wild, so it needs a mix that is chunky and open, never fine or dense. A dense, peat-heavy potting soil holds water around those thick roots for too long and invites rot. The ratio that works well is 4 parts potting mix, 3 parts orchid bark, and 3 parts perlite.
| Ingredient | Parts | Function |
|---|---|---|
| Potting mix | 4 | Organic base that holds some nutrients and moisture |
| Orchid bark | 3 | Creates air pockets and mimics the loose debris Monstera roots climb through |
| Perlite | 3 | Lightweight aeration that keeps the mix from compacting |
In cup measurements, a 10-cup batch works out to roughly 4 cups (950 ml) potting mix, 3 cups (710 ml) orchid bark, and 3 cups (710 ml) perlite. You can scale this up for a larger pot using the soil mix calculator, or read best soil for monstera for more background on why bark matters so much for aroids. If your current soil has gone dense and water-logged, see how to fix compacted soil for a quick diagnosis.
How do you repot a Monstera step by step?
Step by step
Monstera Repotting Process
Time: about 35 minutes
You'll need
- A new pot 2 inches (5 cm) wider than the current one
- Fresh chunky mix (4 parts potting mix, 3 parts orchid bark, 3 parts perlite)
- Clean, sharp pruning shears or a knife
- Rubbing alcohol for disinfecting tools
- A moss pole or trellis (optional, for climbing support)
- Gloves and a trowel
- Prepare the new pot and support. If you plan to add a moss pole or trellis, insert it now before roots fill the pot, so you avoid stabbing through healthy new root growth later.
- Remove the plant. Lay the pot on its side and gently tug at the base of the stem while working the root ball loose. Never pull on the leaves or stems.
- Inspect and trim the roots. Shake off loose old soil and look over the thick roots. Cut away any that are brown, mushy, or smell sour, disinfecting your shears with rubbing alcohol between each cut to avoid spreading disease.
- Divide if needed. If the plant has multiple stems joined by a node, this is a good time to divide it. Cut cleanly at the node, making sure each division keeps enough roots to support itself.
- Set the plant and fill around it. Add a base layer of fresh mix, center the root ball so the stem sits at the same depth as before, then fill in around the sides, tapping the pot to settle the mix without compacting it.
- Water lightly and place in indirect light. Give the plant a light watering to help the mix settle, then place it in bright, indirect light and expect some leaf droop for a few days as it adjusts.
What size pot does a Monstera need after repotting?
Monstera roots need room to breathe, but jumping too many sizes at once leaves excess soil that stays wet long after the roots have used what they need. Size up by about 2 inches (5 cm) in diameter each time rather than doubling the pot size. For more detail on picking the right dimensions, see what size pot for repotting.
| Current Pot Diameter | Recommended New Diameter | Notes |
|---|---|---|
| 6 inches (15 cm) | 8 inches (20 cm) | Young plant, light terracotta or plastic is fine |
| 10 inches (25 cm) | 12 inches (30 cm) | Add a moss pole if the plant is starting to climb |
| 14 inches (36 cm) | 16 inches (41 cm) | Mature, staked plant may need a heavier ceramic pot to prevent tipping |
A mature Monstera trained on a moss pole gets top-heavy, and a lightweight plastic pot can tip over once the plant leans into its support. Switching to a heavier ceramic or terracotta pot at this stage keeps the whole thing stable without needing to size up the diameter further.
How do you care for a Monstera after repotting?
It is normal for a few leaves to droop for 2 to 4 days after repotting while the roots recover from the disturbance and adjust to the new mix. Keep the plant in bright, indirect light and avoid moving it to a different room during this period, since Monstera dislikes sudden changes in light along with root disturbance happening at the same time.
Hold off on fertilizing for about 4 weeks to let the roots settle, then resume a diluted balanced feed once you see new growth. If you are comparing this process with other aroids, how to repot pothos and how to repot a snake plant use a similar general approach but a much less chunky mix, since Monstera's thick roots need far more air pockets than a pothos or snake plant does.
Advice by situation
Mature, staked plants
If your Monstera is tied to a moss pole or trellis, repot into a heavier ceramic or terracotta pot rather than plastic so the top-heavy growth does not tip the whole plant over.
Multiple stems at one node
When you find more than one stem joined at a single node, you can divide the plant during repotting as long as each division keeps enough healthy roots attached.
Root rot from a soggy mix
If roots are brown, mushy, or smell sour, trim them back to firm white or tan tissue and disinfect your shears between every cut before repotting into fresh, chunky mix.
Climbing plants without support yet
Insert a moss pole or trellis at repotting time, before the aerial roots fill the pot, so you do not damage new root growth trying to add one later.
Root-bound but otherwise healthy plants
If roots are tightly circling but look healthy, gently tease them apart by hand before placing the plant in the new pot so they grow outward instead of continuing to spiral.
Common mistakes to avoid
- Using a dense, peat-heavy potting soil on its own. Mix in orchid bark and perlite at a 4:3:3 ratio so the thick roots get the air they need.
- Jumping up 4 to 6 inches (10 to 15 cm) in pot size at once. Size up by about 2 inches (5 cm) at a time to avoid excess wet soil sitting around the roots.
- Adding a moss pole after the roots have filled the pot. Insert the pole or trellis at repotting time, before new roots grow in and make it hard to add support without damage.
- Ignoring brown, mushy roots during the move. Trim damaged roots back to healthy tissue and disinfect your tools between cuts to stop rot from spreading.
- Repotting in late fall or winter. Wait for spring or early summer when the plant is actively growing and can recover from root disturbance quickly.
- Panicking over leaf droop right after repotting. Expect a few days of droop as normal transplant adjustment, and only worry if it continues for more than a week.
Quick checklist
- Confirm it has been 1 to 2 years or roots are visibly circling or emerging from drainage holes.
- Mix 4 parts potting mix, 3 parts orchid bark, and 3 parts perlite.
- Choose a pot only 2 inches (5 cm) wider than the current one.
- Insert a moss pole or trellis before backfilling with soil.
- Trim mushy or brown roots and disinfect tools between cuts.
- Divide at a node if multiple stems are present and healthy enough.
- Water lightly after repotting and skip fertilizer for about 4 weeks.
Frequently asked questions
How often does a Monstera need repotting?
Most Monstera plants need repotting every 1 to 2 years since they are fast growers, though a mature plant in a large pot can sometimes go 2 to 3 years between repots.
Can I use regular potting soil for a Monstera?
Plain potting soil on its own is too dense for Monstera's thick roots. Blend it with orchid bark and perlite at a 4:3:3 ratio so water drains quickly and air can reach the roots.
Is it normal for Monstera leaves to droop after repotting?
Yes, mild drooping for 2 to 4 days is a normal reaction to root disturbance. If it continues beyond a week, check for overwatering or roots planted too deep.
Should I add a moss pole when I repot my Monstera?
Yes, if your plant is starting to climb or produce larger leaves, add the pole or trellis at repotting time so you do not disturb established aerial roots later.
Can I divide a Monstera while repotting?
Yes, if the plant has multiple stems connected at a node, you can cut cleanly between them as long as each division keeps enough healthy roots to survive on its own.
What pot material is best for a tall, staked Monstera?
A heavier ceramic or terracotta pot works best for mature, staked plants because it adds the stability a lightweight plastic pot cannot provide once the plant leans into its support.