Best Pot for a Monstera: Size, Material, Drainage
By Sara Linwood, houseplant writerLast updated
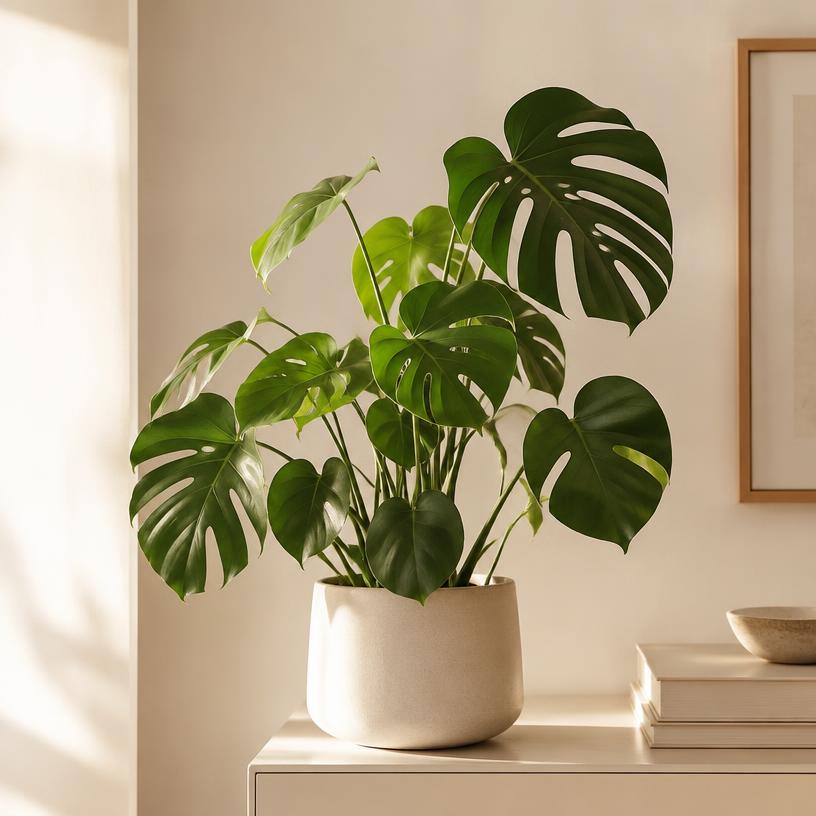
The best pot for a Monstera is a heavy ceramic or terracotta vessel with at least one large drainage hole that is 2 inches (5 cm) wider than the root ball. For large plants with a moss pole, a heavy pot is essential to prevent tipping, while a chunky aroid soil mix ensures the roots stay aerated in deeper containers.
What size pot does a Monstera need?
Choosing the right size is the most important part of picking a pot for your Monstera deliciosa. If you choose a pot that is too large, the excess soil holds onto water for far too long. This creates a soggy environment that suffocates the roots because there is not enough oxygen in the mix. A pot that is too small will cause the plant to become root-bound quickly, which stunts growth and makes it difficult for the soil to hold any moisture at all.
The general rule for sizing is to go up by 2 inches (5 cm) in diameter from the current pot. If your plant is currently in a 6 inch (15 cm) pot, the next step should be an 8 inch (20 cm) pot. This provides enough room for new root expansion over the next year without overwhelming the plant with empty, wet soil. For a very fast growing Monstera, you might consider a 3 inch (8 cm) jump (which for an 8 inch pot requires about 12 cups or 2840 ml of soil), but never double the pot size in a single move.
| Plant Height | Root Ball Width | Ideal Pot Diameter |
|---|---|---|
| 1 to 2 feet (30 to 60 cm) | 4 to 6 inches (10 to 15 cm) | 6 to 8 inches (15 to 20 cm) |
| 2 to 4 feet (60 to 120 cm) | 8 to 10 inches (20 to 25 cm) | 10 to 12 inches (25 to 30 cm) |
| 4 to 6 feet (120 to 180 cm) | 12 to 14 inches (30 to 35 cm) | 14 to 16 inches (35 to 40 cm) |
| Over 6 feet (180 cm) | 16+ inches (40+ cm) | 18 to 20 inches (45 to 50 cm) |
When you measure for a new pot, focus on the width across the top rim. The depth of the pot usually scales with the width. Most Monstera plants thrive in standard proportion pots where the height is roughly equal to the width. If you find a very deep pot, you must be extra careful to use a very chunky soil mix, like the 4:3:3 ratio found in our soil mix calculator, to ensure that air reaches the bottom of the container.
If you are unsure if your plant is ready for a bigger home, look for roots growing out of the drainage holes or pushing up through the top of the soil. A typical 10 inch (25 cm) pot requires about 18 cups (4260 ml) of soil to fill, so ensure you have enough chunky mix ready before you begin. You might also notice that the plant needs water much more frequently than it used to. These are all clear signs your plant needs repotting. If the plant looks healthy but has stopped growing, it may simply be out of space to expand its root system.
Is terracotta, plastic, or ceramic better for Monstera?
Each pot material has a different effect on how long the soil stays wet. Since Monstera roots need a balance of moisture and oxygen, the material you choose should match your watering habits and your home environment. Terracotta is the most breathable option. It is made from porous clay that allows water to evaporate through the walls of the pot. This is excellent for preventing root rot, but it means you will need to water more often, especially in dry climates.
Plastic pots are the most common and affordable choice. They are non-porous, meaning water only leaves the pot through the drainage holes or by being absorbed by the plant. This keeps the soil moist for longer, which can be a benefit if you tend to forget to water. However, if you have a heavy hand with the watering can, plastic pots can easily lead to soggy soil. Many growers use a plastic nursery pot inside a decorative ceramic cachepot, which offers the best of both worlds: good drainage and a stylish look.
| Material | Breathability | Weight | Best For |
|---|---|---|---|
| Terracotta | High (Porous) | Medium | Over-waterers and humid homes |
| Plastic | None (Non-porous) | Light | Under-waterers and dry homes |
| Glazed Ceramic | None (Non-porous) | Heavy | Tall plants needing stability |
| Fabric / Grow Bags | Very High | Light | Maximum aeration for roots |
Glazed ceramic pots are similar to plastic in that they are non-porous. The glaze seals the clay, so water cannot escape through the sides. The main advantage of ceramic is its weight. As a Monstera grows, it becomes very top-heavy. A plastic pot can easily tip over if the plant leans too far to one side. A heavy ceramic pot provides a stable anchor for the plant, especially once you add a moss pole for support. If you choose ceramic, always verify that there is a hole in the bottom; many decorative ceramic pots are sold without drainage, making them unsuitable for direct planting.
If you live in a very humid area, terracotta is almost always the better choice because it helps the soil dry out between waterings. In contrast, if your home is very dry, a plastic or glazed ceramic pot will help maintain the consistent moisture that Monstera deliciosa enjoys. Regardless of the material, the soil mix is the foundation. You can read more about the best soil for Monstera to understand how to adjust your mix for different pot types.
What is the best pot for a tall Monstera with a moss pole?
As a Monstera matures, it naturally wants to climb. In its native rainforest habitat, it uses thick aerial roots to latch onto trees. Indoors, we provide a moss pole or trellis to mimic this support. Once you add a support structure, the weight distribution of the plant changes significantly. A tall Monstera on a 4 foot (120 cm) moss pole has a high center of gravity, which makes it prone to falling over.
The best pot for a staked Monstera is a wide-based, heavy ceramic or terracotta pot. The weight of the pot acts as a counterweight to the leaning plant. Plastic pots are usually too light for this purpose unless they are placed inside a much heavier decorative container. When you are picking a pot for a plant with a pole, look for a 'cylinder' or 'column' shape rather than a sharply tapered 'V' shape. A wider base provides much better stability against tipping.
When you learn how to repot a Monstera with a pole, you should place the pole into the pot first, then position the plant against it. This allows you to fill the soil around both the pole and the roots, locking the support into place. If you try to push a pole into a pot that is already full of soil and roots, you risk damaging the root system and the pole will never be truly stable. A pot that is at least 10 to 12 inches (25 to 30 cm) deep is usually necessary to bury enough of the moss pole to keep it upright.
For very large specimens, you might even consider a heavy concrete pot or a large wooden planter. These materials offer maximum stability. If the pot is extremely heavy, consider placing it on a rolling plant stand so you can still move it for cleaning or to adjust its position relative to the light. Just make sure the stand can handle the combined weight of the pot, soil, water, and the plant itself.
Do Monstera pots really need drainage holes?
Yes, a drainage hole is non-negotiable for a healthy Monstera. While it is technically possible to grow a plant in a pot without a hole, it is extremely difficult to do so without eventually causing root rot. Without a hole, excess water pools at the bottom of the pot. This water becomes stagnant and displaces the air in the soil. Monstera roots need to breathe; if they are submerged in water for even a few days, the tissue begins to die and rot sets in.
If you have a beautiful pot that lacks a hole, you have two options. First, you can use the 'double pot' method. Keep the Monstera in a slightly smaller plastic nursery pot with plenty of holes, and place that inside the decorative pot. When you water, take the plastic pot to the sink, let it drain completely, and then put it back. This keeps the decorative look while protecting the roots. Alternatively, you can use a masonry drill bit to carefully drill a hole into the bottom of a ceramic or terracotta pot.
A single large hole in the center is usually sufficient, but multiple smaller holes are even better for drainage. If you notice that water is taking a long time to exit the bottom of the pot, the hole might be blocked by a large piece of bark or a stone. You can gently poke a chopstick through the hole to clear any obstructions. Healthy drainage is the partner to a good soil mix; you need both to ensure your plant lives a long life.
Should you add a gravel layer at the bottom of the pot?
There is a common gardening myth that adding a layer of gravel, stones, or pot shards to the bottom of a pot improves drainage. Science shows that this actually does the opposite. This practice creates what is known as a 'perched water table.' Water does not move easily from a fine-textured material (soil) into a coarse-textured material (gravel) until the soil above is completely saturated.
When you add gravel to the bottom, you are effectively moving the bottom of the pot higher up, closer to the roots. The soil right above the gravel stays soaking wet, which increases the risk of root rot rather than decreasing it. Instead of using gravel, you should fill the entire pot with a high-quality, well-draining soil mix. This allows water to move through the entire column of soil and exit the drainage hole naturally.
If you are worried about soil falling out of a large drainage hole, you can place a small piece of mesh screen or a single coffee filter over the hole. This will keep the soil in place while allowing water to pass through freely. For a Monstera, the focus should always be on the aeration of the entire root zone. A mix of 4 parts potting mix, 3 parts orchid bark, and 3 parts perlite provides the necessary structure without the need for any 'drainage layers' at the bottom.
If you have already added gravel to your pots, it is a good idea to remove it during your next repotting session. You will likely find that the roots near the gravel are darker and less healthy than the roots higher up in the pot. By removing the gravel and using a consistent mix throughout the container, you provide a much more stable and healthy environment for your Monstera to grow.
Advice by situation
Beginners
Start with a plastic nursery pot placed inside a heavy decorative ceramic pot. This makes it easy to check the roots and ensures you have proper drainage while maintaining stability.
Dry homes
Use plastic or glazed ceramic pots to slow down evaporation. If your humidity is below 40 percent, terracotta may dry out too quickly, causing the leaf edges to turn brown and crispy.
Humid homes
Choose unglazed terracotta pots. The porous clay helps moisture escape through the sides, preventing the soil from staying wet for too long in a humid environment.
Over-waterers
If you cannot resist watering your plant every few days, use a terracotta pot and a mix with extra perlite. The terracotta will help wick away the excess moisture before it causes rot.
Common mistakes to avoid
- Choosing a pot that is too large for the current root system. Only size up by 2 inches (5 cm) at a time to ensure the soil can dry out properly.
- Using a pot without any drainage holes at the bottom. Either drill a hole or use the double-pot method with a plastic nursery pot inside the decorative one.
- Adding a layer of rocks or gravel to the bottom for 'drainage'. Skip the rocks and fill the entire pot with a chunky aroid soil mix to avoid a perched water table.
- Using a lightweight plastic pot for a tall, climbing plant. Switch to a heavy ceramic or terracotta pot to provide a stable base for the moss pole.
- Forgetting to clean a secondhand pot before use. Wash old pots with a solution of 1 part bleach to 9 parts water to kill any lingering pathogens or pests.
Quick checklist
- Select a pot that is 2 inches (5 cm) wider than the current one.
- Verify the pot has at least one functional drainage hole.
- Choose terracotta for high humidity or ceramic for tall plants.
- Prepare a chunky 4:3:3 ratio mix of potting soil, bark, and perlite.
- Place a mesh screen over the drainage hole to keep soil in.
- Ensure you have a moss pole ready if the plant is over 2 feet (60 cm) tall.
Frequently asked questions
Can a Monstera grow in a pot without holes?
It is not recommended. Without holes, water pools at the bottom and rots the roots. Use a nursery pot inside a hole-less pot if you like the look.
What is the best material for a large Monstera?
Heavy ceramic or terracotta is best because it prevents the top-heavy plant and its moss pole from tipping over.
How deep should a Monstera pot be?
The pot should be deep enough to accommodate the root ball and about 4 to 6 inches (10 to 15 cm) of a moss pole base for stability.
Does terracotta make Monstera dry out too fast?
In dry indoor air, terracotta can dry out the soil in just a few days. If you use terracotta, you may need to water more frequently.
Can I use a self-watering pot for a Monstera?
Self-watering pots can work, but you must use a very chunky mix to prevent the roots from staying too wet. Monitor the soil closely for the first month.
Should I use a cachepot for my Monstera?
Yes, using a plastic nursery pot inside a decorative cachepot is a great way to combine functionality with style.